FIGURE 3 |
STEP 5
HEAT YOUR KISTKA
Now its time to apply the wax. You will use a tool called a Kistka.
It contains a brass cup or a well made of rolled copper foil. A candle
supplies the heat to melt the Beeswax
which will be placed inside the cup. Once liquid, the wax will flow through
a small hole in the bottom. For this design, choose a medium size
kistka (Blue handle, if you purchased the kistka
from us). The size of the kistka determines the width of the line that
it produces. Hold the well of the kistka over the middle part of the flame,
with the cup tilted at a slight angle (FIGURE-3). Typically it only takes
5 to 10 seconds to bring the cup up to temperature. As you work, you will
have to continuously put the tool back into the flame for a few seconds
before drawing on the egg again. |
|

FIGURE 4 |

FIGURE 5 |

FIGURE 6. |
STEP 6 FILL KISTKA WITH WAX
With the hot kistka, take the block of Beeswax
in your other hand and scoop the edge. (FIGURE 4) Similar to cutting butter
with a hot knife. Your goal is to fill the cup 1/2 to 3/4 full. Don't overfill.
Before proceeding , take a quick look at the bottom of the tip. Look for
the "BLOB" (See FIGURE 5). This is the accumulation of a large drop of
wax on the outside of the cup, typically near the bottom. Touch it on the
egg and, a large pool of excessive wax will mystically appear on
the shell. To prevent this, touch the tip back on the block of wax and
the extra wax will flow off. Beginners have a bad habit of touching it
to the paper. Sure this cleans the wax off, but it wastes the wax and picks
up lint which eventually ends up on the tip. An alternative method is to
chop up the wax into small pieces that can be dropped into the wax cup.
Personally , I choose to use Spaghetti
wax, which can be easily cut into small pellets. |

FIGURE 7 |

FIGURE 8 |

FIGURE 9 |

FIGURE 10 |
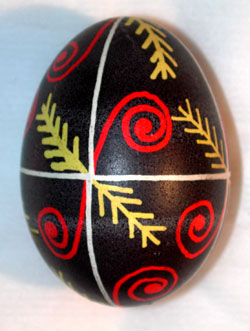
STEP 7 APPLY THE WAX
The purpose of the wax is to seal the shell under the wax, preserving the
color of the shell at the time. Currently the shell is the natural color
of the egg. Therefore, all the lines we draw in wax on the egg at this
step, will in the end, be the color of the shell. The egg in our example
is white, so those lines will be white when we finish the Pysanky. The
color of the wax has absolutely nothing to do with the process. This
may sound obvious, but think before you start. Know where the beginning
and end points of the line are. Ideally, you want to start and stop where
the lines intersect. This is not mandatory, but it will result in cleaner
more uniform lines. Your kistka is now filled with wax. Reheat the tip
in the candle flame to keep it liquid. Once out of the candle flame,
quickly move to one of the middle intersect lines (FIGURE 7). Keep the
kistka cup slightly tilted and move along the pencil line (FIGURE 8) until
you reach the next intersection. (FIGURE 9). It helps to keep your forearms
flat on the table. Move the kistka by rotating your wrist away from your
body and rotate the egg toward you at the same time. This movement results
in smaller wrist movements and straighter lines. Using the same technique,
complete the remaining 11 segments on the egg. You will have to refill
your kistka with wax several times. The final egg should have all
pencil lines covered in wax ( See FIGURE 10). |